My First Two-Tier Cake

Image


Although I am constantly baking and cooking, it’s been a while since I’ve made a “proper” cake.  Actually it’s been about 7 months, and it was a cake I did for Hubby’s 40th birthday.

Image


Since then, I’ve been keen to get back into cake decorating, but life and toddler wrangling has kept me away.  Plus, I needed a big occasion to make one for.
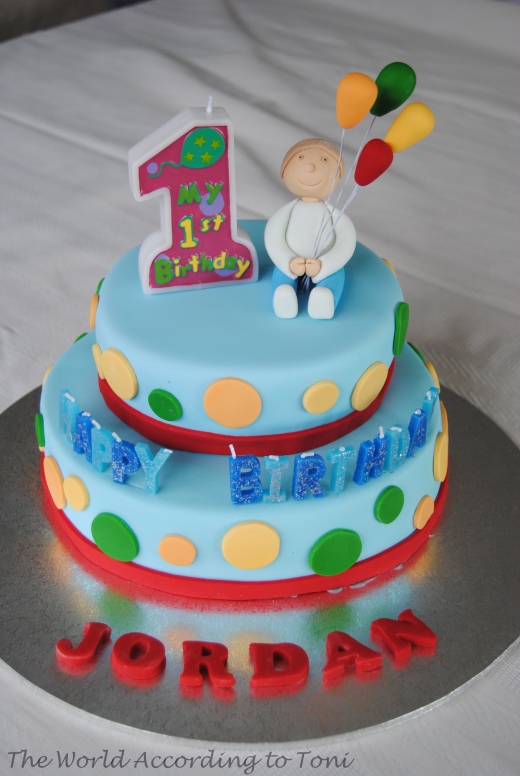
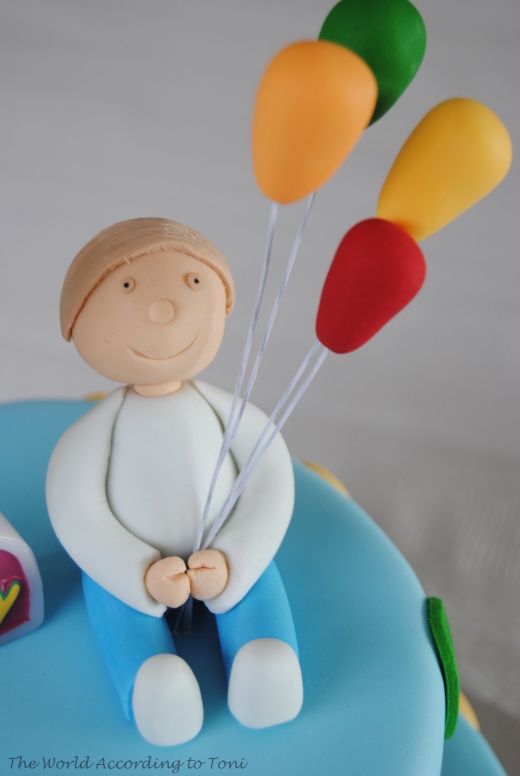
So when I was having dinner at my next door neighbours house a few weeks back and she was talking about her son Jordan’s upcoming 1st birthday, I offered to do the birthday cake as my present for the birthday boy.  Inside I was getting all excited about cake decorating again, until Jordan’s older sister piped up and said “oh mum, wouldn’t it be cool if there was a little boy on top of the cake holding balloons!!!!”.  Oh Crap I thought.  I’d never done a figurine before…

So after a few YouTube tutorials and reading up my Planet Cake books, I made my first figurine.

ImageNot bad for a first attempt if I do say so myself 🙂

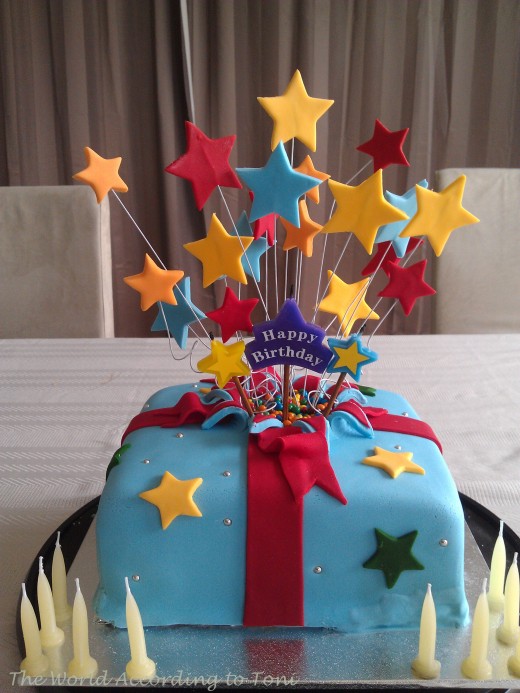
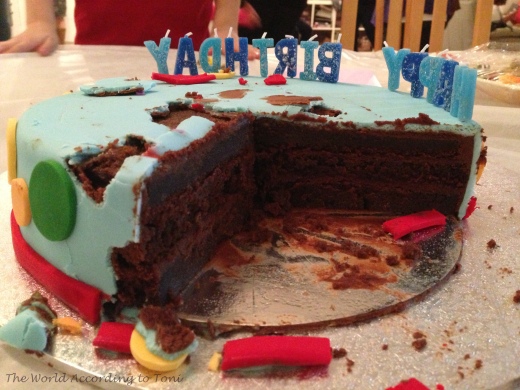
Initially, I had only planned to do a single tier cake.  But after I had made it, it just didn’t have that ‘wow’ factor.  So at the (nearly) last minute, well it was Thursday and the birthday party was Saturday, I decided to attempt make a second tier.  I also had reservations about the actual cake itself, as I usually use mud cakes for the decorated cakes as they are dense, can take the weight of decorations and tend to stay moist longer (I always brush each layer of cake with syrup anyway), but this time I changed recipes and used a “Devil’s Food Cake” recipe which was a little bit more ‘crumbly’ than the mud cakes and not as dense.  Luckily it all turned out alright.  One guest even said “it’s the best mud cake I’ve ever eaten”. Lol.  The top tier was devoured in seconds.

Image


I still can’t get the nice crisp edges on the corners, but for now, I think I’m happy to live with the rounded edges.

Image

Bubba’s 1st Birthday Cake

Edit: I haven’t been on my own blog for aaaaages, that I didn’t even realise I wrote this post and didn’t even post it. Doofus! I wrote this wrote this post in October (I think), last year…

Wow! I can’t believe it’s been 14 months since my last blog post. So much has changed since that last post – construction on our house started and finished, we moved into our new house and most importantly I had a little Baby Boy in September 2011!!

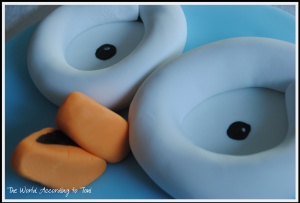
Which brings me back to this post. A few weeks back my little Bubba turned one, and for his cake I decided to re-create his favourite tv character – Hoot the owl from Giggle and Hoot on ABC2. The kid just loves Hoot. If he’s in another part of the house when Giggle and Hoot comes on the tele, he’ll crawl/run in his walker to look at the tv.

I considered doing a 3D version of the cake, but I had quite a bit on, so I decided to make the cake just using 2 different sized round cakes and joining them together. The head was chocolate mud and the body was white chocolate mud. The recipe and decorating techniques of the cakes was from the Planet Cake (1st) book. In hindsight, I should’ve Googled other Hoot cakes before I did the decorating around the eyes and eyebrows, but I got so caught up in doing the cake, that I totally forgot and only remembered when the icing had already hardened and set onto the blue fondant icing.

I got quite a few compliments for the cake, but the best one was from my son – when he saw the cake before I finished it and he started to say “Hoo Hoo” just like he does when Hoot comes on the tv.

Now, time to start thinking about what to do for 2nd Birthday…

Mixy’s Birthday Cake

A long time ago, each time I saw the Planet Cake book in the book shop, I would go through the pages and ‘ooh’ and ‘aah’ to myself at all the cake creations on it.  If I didn’t have enough time to flip through the book, I would just stop for a sec and admire the cake on the cover and quickly move on.

The cake on the cover is the designer handbag cake, usually called the ‘Chanel bag Cake’ and ever since I told Mixy I wanted the book, she said if you ever get the book, you have to make the Chanel handbag for my birthday.  A few months down the track, my birthday wishes came true and I received the book for my birthday.  Fast forward 10 months later, I finally make the Chanel Cake for Mixy’s birthday.  It was the second cake in my New Years Resolution and an easy next step up from doing round cakes.

I read and re-read the steps quite a few time making sure I gave myself plenty of time because I always find I’ll read the steps and it’s not until you get stuck in and decorating that you realise it takes you way longer than anticipated to do the steps that seem so easy-peasy in the book.  I made sure I had all the necessary tools, equipment such as boards and templates, enough fondant, gel food colours etc etc etc.  I gave myself a good week to make it as I was doing it either after work when I was on morning shift or before work when I was afternoon shift.

Here’s a quick version of what I did:

Day 1

  • Bake the cake
  • Allow to cool completely ie overnight
  • If using coloured fondant colour your fondant now so it has time to develop and you can adjust if necssary

Day 2

  • Cut the cake into the desired shape for the hand bag and position the cake on the decorating board (a piece of hard cardboard that is the same size as the base of the cake – makes it easy to pick up and move the cake)
  • Cut the cake into 3 layers and brush each layer with syrup (to keep moist)
  • Sandwich them back together with ganache. Use any cake off cuts to fill in any large holes and gaps
  • Apply the first covering of ganache around the sides and the top
  • Leave to set overnight
  • I also made the black handles at this stage as the black fondant I was using was very sticky and needed plenty of time to dry before I could handle it again to attach to the cake

Day 3

  • Hot knife the ganache to remove any large ‘jaggered’ bits
  • Apply another layer of ganache this time paying special attention to try and get it as smooth as possible
  • Leave to set this should take about 30 minutes, depending on how warm it is
  • While waiting knead your fondant so it’s nice and pliable
  • Once the ganache is set on the cake (dry to touch), brush the ganache all over with syrup so that the fonant can adhere to the cake
  • Roll out the fondant to the desired thickness (I usually try and do it about 5mm) and shape
  • Place the cake on the display board using either royal icing or ganache to hold it in place on the board
  • Cover the cake with the fondant, smoothing as you go with plastic smoothers of little pvc sheets to get it as smooth as possible.  Trim away any excess
  • Add the quilting pattern to the cake using a stitching tool (bought from a haberdashery shop).  This needs to be done while the fondant is still soft to touch.  If done once the fondant has hardened it will either not leave a ‘deep’ enough imprint or end up cracking the fondant

Day 4

  • Add the rest of the embellishments – zipper, handles, piping along the edges, key charm or monogram letters
  • Stand back and admire your handy work 🙂

Day 5

  • Should’ve been about taking photos of the finished cake.  But no.  I got side tracked doing this, that and the other, and before I realised, it was 5pm and I still needed to have a shower, get ready, and deliver the cake to the restaurant before heading to the cocktail bar for pre-dinner drinks!
  • So all I have is some lame-arse photos, most of them taken in my messy kitchen right before leaving home.

Handbag Cake sans handles and charm

Zip Detail

Zip after one coat of 'gold' paint

The Finished Product

High Tea for 3

Some people may call me a pessimist, but I prefer to see myself as a realist.  I find it very hard to take what other’s may call a ‘really good deal’ at face value and I’m always looking for the catch.  As the saying goes, “there’s no such thing as a free lunch”.  So when all these deal, coupon, group-buying websites burst on to the scene a few months back, I was very hesitant to jump on board.
But sometimes my stomach can overrule my head.  Which was the case when I saw a Scoopon deal for High Tea for two people at Museum of Sydney Cafe for $58.  I read the fine print over and over to make sure I wasn’t just paying for some scones and whipped cream, then I signed up.

Ever since my husband found out my sister organised high tea for me, her, our mum, my mother in-law to be and my brother’s girlfriend for part of my Hen’s day, he’s always wanted to attend high tea – you see, we’re kindred spirits in that we both share a love of cakes.  And to attend a meal where you’re presented with a selection of sweet treat equals heaven for the both of us 😀

MoS Cafe

The day we went was a glorious autumn’s day, I could’ve even thought it was summer.  The Scoopon was only valid for Sundays, which was fine for us as I hoped it would mean avoiding a bunch of Hens out on their Hen’s day.  Once seated we were offered sparkling Voss sparkling mineral water.  I’m usually not a fan of sparkling mineral water, but as we couldn’t get the attention of the waitress and I was quite thirsty after a walk from the car park station in the unusually warm weather, I downed half a glass before I realised it was sparkling and that I didn’t mind it at all.

Champers

The Scoopon also included a glass of Moët champagne on arrival, but I was a little disappointed that the waitress brought out glasses of champagne to the table and did not pour the glasses of champagne from the bottle.  In my books, I think that could leave room for a little cheating on the cafe’s part – how does the patron know they’re getting Moët?  It didn’t bother me too much as I’m not really a fan of Moët and I wasn’t drinking either that day.

Sandwiches

Another point of contention, our tower of food was served to us before we were asked whether or not we wanted tea.  So we started anyway with the ribbon sandwiches.  The bread was so pillowy soft especially the brown breads.  Our selection was one poached chicken, house made aioli and parsley ribbon sandwich, one smoked salmon, capers and cream cheese and two cucumber ribbon sandwiches.  Between the two of us.  It was at this point during the high tea, when I was mentally planning a solution to the usual moaning from my husband, complaining that we’ve gone out to eat somewhere and he hadn’t had enough to eat.

We halved the chicken and salmon sandwiches so we both could get a taste of each.  Both the chicken and salmon sandwiches were very tasty especially the chicken sandwich with the aioli.  The cucumber sandwich was quite bland, I’m not sure what was in with the cucumber, apparently it was aioli, but didn’t really add any flavour to the sandwich.

Quiches and Scones

Second level on our tower featured two varieties of quiches – mushroom and Lorraine and two types of scones – date (well a tiny piece of date on top of a plain scone) and plain.  Don’t ask me what was in the little ramekin next to the whipped cream, because I don’t know what it was.  I think it was a type of fruit chutney, but I couldn’t quite put my finger on it as to exactly what it was.  It tasted nice, but I was expecting strawberry jam to go with the scones and cream.  This dish was a little Meh.  A bit of sustenance, but nothing to write home about.  The scones were ok, but after having Devonshire tea at Betty’s in York, UK, nothing beats clotted cream with scones.  The quiches were a tad undercooked – the pastry on the bottoms of the shells could’ve done with an extra 2 minutes or so in the oven.

Sweets

The top and favourite plate.  Sweets. Featuring cannoli filled with sweetened ricotta, strawberries dipped in ganache, chocolate cups filled with creme patissiere and mini cheesecakes.  I loved the little filled chocolate cups.  The strawberries were ok, but I prefer strawberries dipped in tempered chocolate so that you really have to bite to get into the strawberry then you have the shards of hard chocolate in your mouth with the soft juicy strawberry.  The cannoli were just the right size to go on a plate with sweets.  They were lovely, but my standards are pretty high for cannoli after visiting La Casa.  I’m not really a cheesecake fan, but these little mini ones were just the right size for me.  But the cannoli were definitely the highlight of the sweets plate for me.

Overall, for the price we paid for high tea for two, I can’t really complain too much.  We were fed and sated and luckily for me, Hubby didn’t complain that he was still hungry!

Oh, and if you’re wondering as to the title of this blog post, who the third person at the high tea was…. our first little Bump!  At the time of the high tea I was 10 weeks pregnant, now currently 25 weeks and yes, it’s taken me this long to blog about this day.  The biggest symptom I’ve had so far is tiredness – I’ve never felt so tired in all my life which has meant that any spare time I’ve had is either sleeping or just lying on the couch totally exhausted.  And that’s had the follow on effect of  hardly any cooking, definitely no baking or blogging.

But I’m glad to say, finally at 25 weeks, I feel like I’m getting back into my groove even to the point of meal planning for the week and some impromtu baking.  Hopefully I’ll be able to get a few more posts out before I’m back to feeling exhausted again 🙂

Malaysian Food Kitchen Market

The Malaysian Food Kitchen Market was on in Sydney from Wednesday 16th till Friday 18th February in the State Theatre lane way, off George Street, which if you weren’t looking for it would be easily missed.  And if it wasn’t for some the lovely people I follow on Twitter, I wouldn’t have found out about this event until it was over.  Then I read Chocolatesuze’s, Grab Your Fork and Noodlies’ blog posts on the event and I knew I had to go.

For the past few months, I’ve had a bit of a fascination for Malaysian foods and in particular Mamak, which everyone seems to be raving on about.  But as well as raving about the food, there’s also lots of discussion on the huge lines and queueing required to dine there (at both the Haymarket and Chatswood restaurants).  So when I saw Mamak would be one of the restaurants featured at MFKM and the fact that is was $10 for 4 courses from some of Sydney’s best Malaysian restaurants and I couldn’t let the opportunity go by.

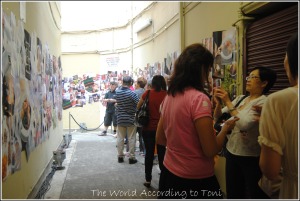
On the day I went  – lunch session on the last day, I made sure I got there nice and early as I heard the queues to get in were really long and each dining session was at capacity half an hour before it was due to start!  So I got there at about 11:15 for 12pm session and there were already 20 people lined up.  Within 15 minutes, the line was already 2 shops long down George Street.  Thank God I got there early!  By 11:40 the line started moving in, we paid our $10 and shuffled into the lane way for the next bit of lining up.

Lining up inside the lane way

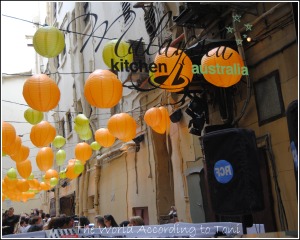
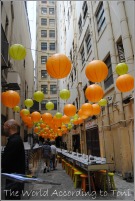
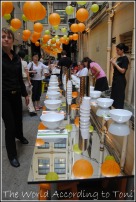
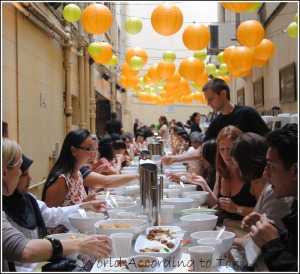
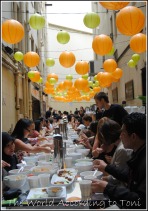
After a short wait, we were ushered around the corner to where the tables were set up and the place looked pretty cool.  Yellow and orange lanterns hanging overhead with long communal tables with mirrored tops.  So purty!

We we were finally seated, I found out to my disappointment, there was no Mamak on for this lunch session.  Dammit!! I was really looking forward to their Roti Canai and Ayam Goreng (fried chicken) as seen here and here.  Oh well, guess it just means, I’ll have to join the queues with everyone else to try out the tasty morsels from Mamak 😦

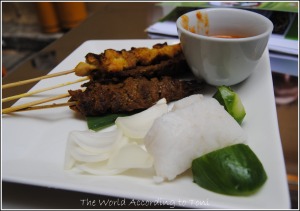
As soon as we sit down, the food comes out.  First dish off the mark is from Kaki Lima.

This dish is Jahoran chicken and beef satay served with peanut sauce, cucumbers, onion and compressed rice.   I luuurved the peanut sauce on this dish, I was dipping everything in it – the rice and cucumbers.  It was sweet with just the smallest hint of heat in it.  The beef was a little too dry for my liking, so it went well when dipped in the sauce.

Next dish to come out was from Malacca Straits.

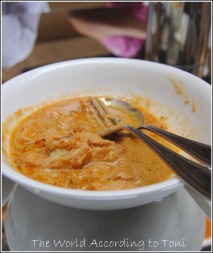
This dish was my favourite of the day.  It is a Penang chicken Kapitan – a Penang style mild chicken curry with lime juice, lemongrass, kaffir lime leaves, coconut and candle nuts served with steamed rice.  I definitely had a case of ‘eyes bigger than stomach’ when it came to this dish.  Each plate that was served was 2 servings, as I was dining on my own, I had the 2 servings of each dish all to myself 😀  It was mild (how I like my curries) with just a little bit of heat coming through.  It was fragrant, sweet and coconutty with plenty of chicken thigh pieces as well.  I actually wasn’t expecting as much chicken as I got as usually with these ‘tasting’ plates, you get lots of sauce and a bit of meat.  But I was very chuffed with this dish.  So I ate it all.  Not a good idea with 2 more dishes to come…

Next up was the Nasi Lemak from Jackie M.

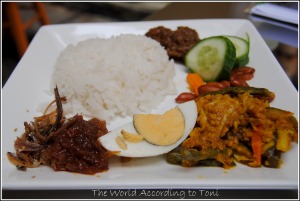
The Nasi Lemak consists of fragrant coconut rice with anchovy sambal, peanuts, egg, cucumber and achar (pickled vegetables).  This dish was super tasty, no wonder it’s the national dish of Malaysia.  I loved the combinations of all the diffrerent textures and flavours in your mouth together, the sweet, sour crunchy and soft.  It’s definitely a dish I’d like to try again as I was really getting full about a quarter of the way through this dish.  My most favourite part of this dish was the little deep fried anchovy, I could even eat those on their own as a little snack food with a nice cool beer.  I did find the sambal a little too spicy when I ate it on it’s own, but combined with some rice and the achar, it toned it down a little.

By the time I got half way through my nasi lemak, I knew I was too full for anything else.

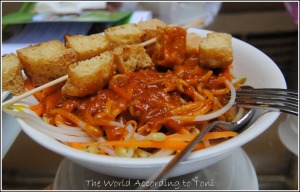
So when the vegetarian Gado Gado from Lees Malaysian came out, I knew I was too full for this.  It was a combination of cabbage, french beans, carrots, bean sprouts and crispy tofu with Lees signature sauce.  I had a few mouthfuls just to get a taste of the dish, but I found the sauce really spicy for my liking.  And a part from the sauce, it was just a bowl of blanched vegetables.  And speaking to the group of Malaysian ladies dining next to me, they were saying it wasn’t an authentic gado gado, so after hearing that, and listening to my stomach, I decided I’d had enough for the day and left the rest of the dish.  All I needed now was a fridge trolley to roll me outta the lane way.

All in all, I think the event as a whole was a great success, if the lines to get into each session is anything to go by.  And pricing it at $10 for 4 courses is a great way to introduce the cuisine to people who might not readily try it.

If you missed out this time, keep an eye on the Malaysian Kitchen Insiders Facebook page as they might put on another event later on this year seeing as this was such a success.

And So the Journey Begins…

Image: Salvatore Vuono

As with most couples after getting married, Hubby and I started saving up for a deposit to buy our first home together.  We didn’t have grand plan for a house – just somewhere in the Inner West, big enough to eventually have a few kids later on in and with a back yard so I could finally have my veggie patch and get a dog.

As we got closer to saving 10% of what we thought we could get a house for and was comfortable borrowing, we enlisted the help of Aussie Home Loan Mortgage brokers in Newtown to find us a suitable mortgage and then started trawling through the Saturday papers, Tuesday’s Inner West Domain lift out and attending some open houses just to get an idea of what it costs to buy a house that ticked our checklist.  And boy, we realised quite quickly that we were WAY off the mark.  It seemed most of Sydney had cottoned-on to what a magnificent area the Inner West is.  We always knew areas like Stanmore, Petersham, Leichhardt, Summer Hill were out of our league, but now, so too was Dulwich Hill, Marrickville, St Peters and Sydenham.  Houses that we inspected and we thought would sell for around high $500,000s, were selling for around $50,000+ more.

Image: Renjith Krishnan

We went to one auction in Hurlstone Park where we thought the house (3 bedroom, Federation house, large block) would sell at the high $700,000s, the vendors were asking for around $850,000.  The auctioned stalled at $900,000, and then shot to $1,050,000.  Un-friggen-believable!  Everyone at the auction was shocked.  Yes, it was recently renovated, but geez, $1.05 million?!?

So we thought we’d either have to re-examine our checklist and see what compromises we were willing to make or broaden our location search.  We weren’t really prepared to make compromises to our list, it wasn’t too much to ask was it – 2 or 3 bedrooms, car spot, back yard, sound roof and plumbing?? So we started looking further afield – Campsie, Arncliffe, Botany, Rockdale, Belmore.  Then before we knew it we were looking at Kingsgrove, Beverly Hills, Punchbowl and Lakemba.  The house prices were less astronomical, but we’d still need to put a lot of work into the houses.

Then in November we were talking to a cousin of mine, J and his wife, L who used to live on our street in Dulwich Hill.  We were telling them of our housing woes and they said they’d done exactly the same thing.  L had grown up in Dulwich Hill and always wanted to stay in the area.  But when it came time to purchase a house and sell their apartment, they looked around Dulwich Hill, Marrickville, then broadening the search to Bexley and Belmore.  Then they came across Prestons (South West Sydney) with a affordable houses and a big backyard and lots of room to grow and not too far from the City on the M5.

And with that, they planted the seed in our head.  First we started looking at houses in Prestons and we couldn’t believe how much we could get for our money – huge 4 bedroom, 2 storey houses, for less than $500,000.  From there we started looking at home and land packages and in the process stumbled onto the display village of Metricon Homes.  They are new to the Sydney region, but have been building houses in Melbourne for the past 30 years.  We really loved their contemporary and modern house designs and layout.  We found the finishes on the display houses were impeccable.  In particular, we fell in love with their Milano 30 house – a single storey, 4 bedroom, double garage house.

Source: Metricon Homes

We were so keen to jump right it and sign on the dotted line.  But before we did, we thought we should research further and check out some of the other display houses such as Parkbridge in nearby Middleton Grange and Homeworld in Kellyville.  But none of the other builders we looked at compared in terms of style and finish to the display houses of Metricon.  So that pretty much made our decision.  Now we just had to find a piece of land to put the house on.

This is when we were starting to panic.  We knew what size of land we needed to fit the house on, it was just a matter of finding it in suburb and at a price we wanted.  We had already been pre-approved for a mortgage and we really didn’t want to borrow more than that because at the end of the day, you need some work/life/mortgage balance.  A girl’s gotta have a holiday every few years (even if it’s just a few days away at the Central Coast!)

Luckily, just as we were looking at the prospect of buying land further down south of Sydney (think Camden :() we found out about a land release by Landcom in Edmondson Park, right next to Prestons.  The new estate, Talana was in the process of the 1st stage of sales so we had to sign up for the next stage.  We kept in close contact with the salesperson and a week and a half later (late November) we found out one of the lots of land sold in the 1st stage had forfeited and was back on for sale – Yay for us!!


Our Land!

So we put down the $300 deposit to secure the land and quickly took the draft plan of the land to show Metricon to make sure it was a suitable size and shape.  They said it was A-Ok.  So straight away, we paid Metricon $1000 to secure the promotion packages they were having at the time and enlisted in the help of a conveyancer to look after the purchase of the land.

So fast-forward to the present, and we’re currently (STILL) waiting for settlement on the land.  This is due to happen at the end of February.  In the meantime, we’ve had our first meeting with Metricon head office to go through the preliminary contract and finalising the structure of the house.  Next meeting in the beginning of March, is when we receive our actual contract and decide on the external colours and façade of the house.

I’m a little excited, but I don’t think I’ll get really excited until it’s time to move in.  Until then, I will keep blogging about the process hopefully with lots of progress photos

Hubby’s Birthday Cake

The first cake on the list for my New Years Cake Resolution was Hubby’s birthday cake.  I didn’t have any grand plans, just a round cake covered in fondant (plastic icing/ready to roll icing) with a few decorations stuck on the outside.

Using my trusty Bible – the Planet Cake book, I followed the recipe for the chocolate mud cake and then followed the directions on how to handle the fondant and how to cover the cake.

Here’s some photos from the process:

Cocoa and flour waiting to be sifted

Baked cake cut into 3 ready to be doused in syrup then sandwiched together with ganache.  Mmm, more chocolate 😀

The sandwiched cake on the board.  Next step is to trim any of the overhanging bits to make sure that the cake is the same size as the board

Ganache covered cake.  This is the first of many ganache steps and probably one of the most important (and possibly most time consuming) steps in making fondant covered cakes.  If the cake is not ganached smooth here, the covered cake won’t have a smooth finish.  The first time I put it on, it’s purely to cover and fill any holes and make the sides level.  I liken it to plastering or  filling wall holes with filler.  I put it on nice and thick, but smooth off any excess.  I then stick it in the freezer for no more than 20 minutes to set the ganache (or if you have time, you can leave it overnight to set).  In the meantime, I boil the kettle and pour a mug of boiling water.  Once the 20 minutes is up, I bring the cake out of the freezer and dip a cranked palette knife into the hot water and trim off any jaggered pieces of ganache off and smooth out the ganache.

Wait for the areas where the hot knife has touched to dry and add another layer of ganache, this time only a small thin layer, paying particular attention to areas that are not particularly smooth or level.

I realised early into kneading the fondant, it wasn’t as easy as it looks on the YouTube videos.  Fondant doesn’t like humidity much.  I just couldn’t get the balance right between warm sticky fondant and dry cracking fondant from adding too much cornflour to stop it sticking on the bench.  And trying to knead 1.5kg of fondant on the kitchen bench when you’re not very tall is not an easy task!  I have since put in the request to Hubby, that when we finally buy our own house and can afford to do it, I want an adjustable height bench top!!  It needs to be adjustable as Hubby is 6ft 4 and I’m only a measly 5ft (Waah!)

Edit: I’ve since learned that if you buy good quality fondant (like Bakels) it makes your life so much easier

So after maybe an hour of kneading and trying to roll out fondant, I got it as thin as I could and not too thin that I that I couldn’t lift it without it tearing off the bench or off the rolling pin and I was left with fondant that was nearly a centimetre thick in some places.  And because I wasn’t too confidant about placing the fondant on the cake, I just pretty much threw it on and was left with a few air pockets.  You can just see the pin-holes on the top of the cake where I pierced the fondant with a needle to try and release the pocket and smooth it out.

In the Planet Cakes book, their race car cake had black, yellow and red race cars decorating the sides of the cake, but I thought that was a little too intricate for me, for my first fondant cake, so I just used some cookie cutters of a car and a motorbike for car and bike mad Hubby.  Plus I didn’t have any gel colours to colour the icing the dark shades or red and yellow (I had bought some black icing), all I had was some liquid food colouring from the supermarket, hence all the pastel blue, green and orange.

And with some letters cut out with some alphabet cutter and following the Planet Cake decoration idea with the chequered flag, Hubby’s birthday cake is finished!

A Short Trip to Melbourne

At the beginning of November, my family and I went down to Melbourne for the wedding of my first cousin, Carlos – my Dad’s brother’s oldest son.  It was a great opportunity for many things: for my husband to meet my incredibly large extended family, some who could not come to our wedding; for my family to go away for a holiday together for the first time in something like 20-something years and the final reason, it’s possibly the last time for a long time Hubby and I will be able to go on a holiday for a while as we’re in the process of buying some land and signing up a builder for our first home 😀
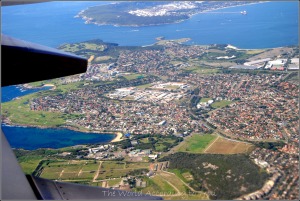
What Sydney looks like from above. Top: Port Botany. Bottom: Clovelly.

The night before the wedding we went to a pre Wedding BBQ, it was a good opportunity for Hubby to learn a little of the cultural traditions that happen in Timorese (and Chinese Timorese) weddings.  When we got married, we didn’t partake in any of the Timorese cultural traditions, so Hubby was relieved to find out he didn’t have to procure a ‘dowry’ for me.  My Uncles (well, not actual uncles ie my parents brothers, but in our culture, male relatives around the same age as my parents and the same generation) duly informed Hubby he ‘missed out’ on having to find a goat, suckling pig and cow at the right size and weight to give to my parents to ‘buy’ me.  I will now never let him forget how easy he’s got it 😀
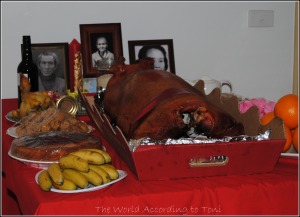
 

Offerings to the deceased

As my Dad’s side of the family is Chinese Timorese, they still practice a lot of the cultural traditions which include participating in honouring our dead relatives with offerings of sumptuous food such as a whole roasted suckling pig and duck, wine and tea, ‘spirit money’ and the burning of joss sticks.
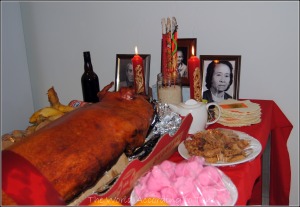
Offerings to the deceased

After this ceremony, it was onto the Tea Ceremony.  In this ceremony, tea is served by the Bride and Groom to their elders.
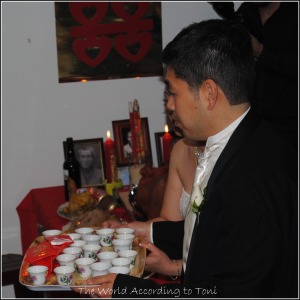
Bride and Groom serving tea

Their elders – grand parents, parents, aunties and uncles, older siblings are seated as the Bride and Groom offer them tea, they take a sip, return the cup to the tray and give the Bride and Groom a gift (money or jewellery) in the traditional red envelope.  If the gift is jewellery, it’s put on the Bride straightaway.
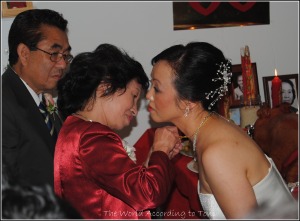
Parents of the Groom putting on their jewellery gift on the Bride

Once the tea ceremony finished we all moved onto the church for a traditional Catholic wedding followed by the wedding reception at a function centre.

While at the reception, I saw some gorgeous light fittings that I wanted to try my Bokeh technique on.

Bokeh Monsters!

The wedding featured a HUGE 7-tier wedding cake, biggest cake I’ve seen in a while!
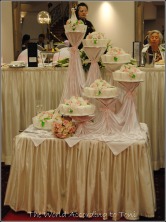
Woah!

It was made by one of my Uncles and I found out later that only the bottom tier was cake, the rest was fondant covered foam as no fresh cake would last the amount of time it took him to do the decorations plus it would be very costly to transport from Sydney to Melbourne.
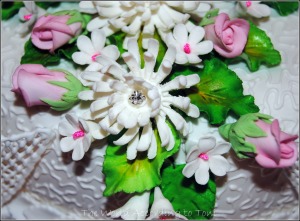
Sugar flowers
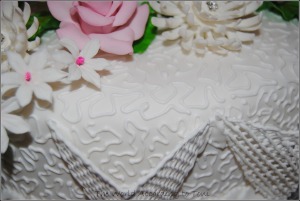
Love that pipe work!


Once the wedding festivities was over, the rest of my family members had to return to Sydney for work, but Hubby and I decided to make the most of being in Melbourne so we hired a car and planned a road trip – first down to the Mornington Peninsula then onto Phillip Island.

But before we got out of Melbourne we decided to check out Melbourne Museum.  The museum is fascinating, there was so much to see and unfortunately we didn’t get to see it all.  We were there for most of the day but only saw 3 exhibitions – the Forest Secrets; Mind: Enter the Labyrinth and Wild: Amazing animals in a changing world.  But here’s a few photos of what we did see.

Stick Insect in the Forest Secrets exhibition

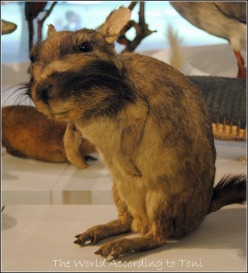
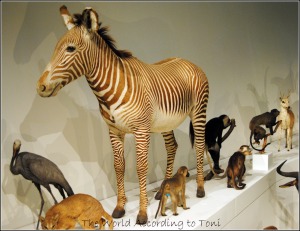
One of the best exhibitions I’ve seen in a long time was the Wild exhibition.  There are more than 750 taxidermied animals on display and the museum has set up these giant swivelling monitors (think huge iPads) with cameras, so you can point the camera at any of the animals, then tap on the image  of which ever animal is showing on the monitor and it’s information will load up on the screen.  It’s amazing!  Here are some of the animals on display:

I could’ve spent a whole day in the Wild exhibition alone.  We were so caught up in the exhibition that it was 3pm by the time we realised what the time was.  So we had to quickly get back to the car and join the peak hour traffic for part 1 of our road trip to the Mornington Peninsula.

First pitt stop was Frankston.  It would’ve been lovely if it had been a nice day.  But it was quite chilly and windy and not a nice day for strolling the pier.
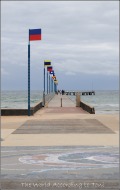
Frankston Pier

When Hubby and I go on road trips, our plan is to find the cheapest accommodation for a bed and own shower.  Be it above a pub, in a motel, it doesn’t matter, as long as it doesn’t cost too much over $100 per night.  And we don’t book until we drive into the town and have a look-see to see what’s around.  On this night, we were nearly got caught out because we didn’t realise it was the beginning of Victoria’s Schoolie’s week and all the kiddies were heading down to the beach-side towns for their holidays.  It was getting towards 6pm and all the rooms available were ‘spa suites’ costing anywhere between $140 upwards a night.  But luckily, thank God for iPhones & Google, we were able to find a motel for $100 a night.  FTW!

The next day we jumped in the car and headed further south to Sorrento and Portsea.
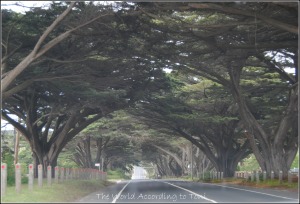
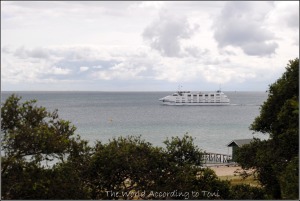
The Sorrento – Queenscliff Ferry

When we got to Portsea, we weren’t too sure what to do, so we just went for a little drive around and we came across the national park – Point Nepean National Park.  This park contains an old quarantine station and a fort containing gun pits  that housed 2 retreating guns.  They’ve done a really good job at preserving and restoring the forts and the quarantine station.  Here are a few pics:
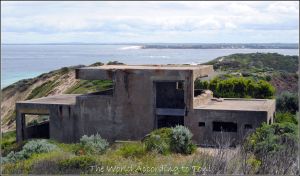
This little lookout is positioned on the point so that it looks out to the Bass Strait from one side and out to Port Phillip Bay on the other.   That’s Point Lonsdale and Barwon Heads in the background.
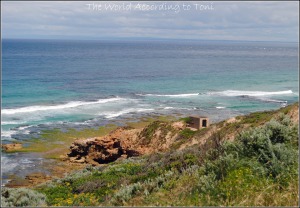
Another lookout, right on the waters edge.  I’d hate to imagine what it’s like being down there on look-out duties during the winter time with the full force of the Bass Strait coming straight at you. Love the all the different blues and greens in that photo.
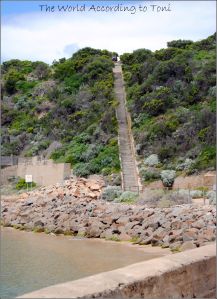
Another thing I’d hate to image, having to climb those stairs.  Thankfully, there was another way to get to where the top of those stairs are, it was much more scenic (read: took longer), but at least it wasn’t so steep.
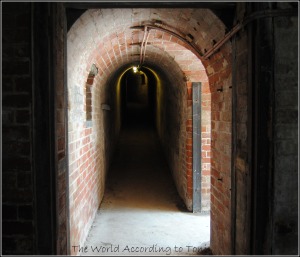
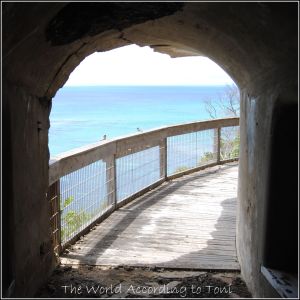
This photo is taken from inside one of the many tunnels that connect some of the lookouts together.  There are plenty of little rooms coming off these tunnels, once probably store rooms or control rooms and the National Park as gone to some trouble to install display boxes with information about the history of the tunnels and the fort itself.
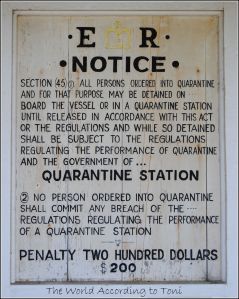
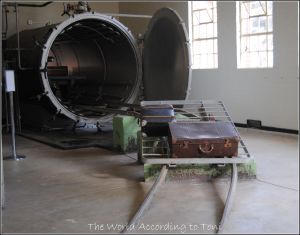
One other area of the National Park that has been preserved pretty well is the Quarantine station (yes, I know, work nerd).  They still have the hospital buildings, the accommodation buildings and the sanitation vaults.
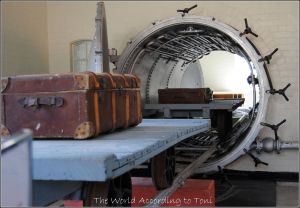
These are the sanitation chambers that were used to steam and disinfect all the luggage personal effect of people entering the state (as it was created before Federation and so each state had their own quarantine regime).  The station was put to the test when in 1852 a ship called the Ticonderoga arrived from England at Point Nepean after 90 days of voyage with 795 passengers on board.  During the trip, the ship was rife with disease resulting in 100 deaths and 300+ sick passengers on arrival.  Overall, 170 people died and their names feature on a memorial granite stone on the site.

Once we finished up looking around the National Park, we had to do the same mad Google search for accommodation as it was nearing 5pm.  Again we found another motel for $100.  Win!
Another win – while we were looking through the tourist brochures, Hubby saw an ad for a hot springs bathhouse located in Rye, which wasn’t too far from where we were anyway.  Peninsula Hot Springs has about 20 thermal mineral baths ranging from about 36 deg Celsius to a hot 43 deg C.  They also have a dayspa centre, but as we were only in the area for a day we opted for the public baths.  We paid $15 each for a twilight bath session which was from 7pm till close at 10pm.  Even though it was a chilly night, sitting in the hot baths meant we didn’t feel the chill.  We even needed a quick dip in the cold plunge pool every now and then.  The soak was definitely what we needed after a long day in the National Park.  Needless to say, we slept well that night 😀

The next day we began our long drive/day from the Mornington Peninsula over to Phillip Island then onto Melbourne airport for our flight home in the evening.  We thought it would take a lot longer as we were leaving our accommodation during peak hour, but surprisingly it only took about 2 hours.
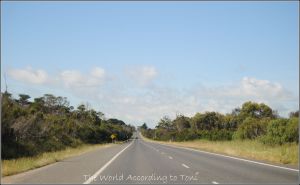
I wonder how many motorcyclist have been booked for speeding on this road?

When we got onto Phillip Island, we had a quick morning tea at a local bakery then continued further on towards Seal Rocks.
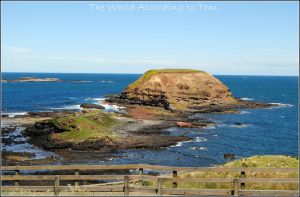
Apparently you should be able to see the seals frolicking on the rocks – but we didn’t have any $2 coins on us that was needed to use the telescopes.
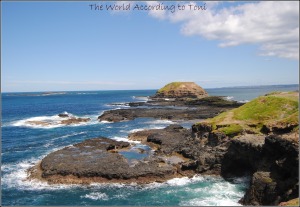
The area is quite breathtaking.  I could’ve stayed down here for the whole day.
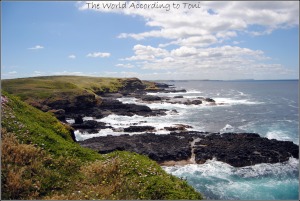
But we couldn’t as we had to move onto the Phillip Island Grand Prix Circuit.

Hubby is a keen motorcyclist and we couldn’t come all the way to this neck of the woods and not visit the Grand Prix track.
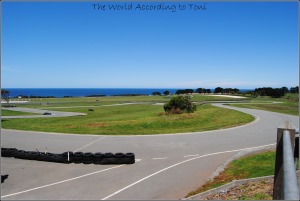
Being the big kid that he is, we booked in to do 2 laps of the go-kart track which is an exact 1:5 replica of the actual track.  I felt like a little ol’ nanna driving around the track with Hubby and a bunch of 16-year-old teenage boys whizzing by and lapping me.  Actually, ‘little’ is quite apt, as I just (read: wouldn’t have been allowed if I stood against the height requirement line) made the height requirement to drive the go-karts.  When I actually sat in the karts, I had to sit on and against piles of thick foam so I could reach the pedals properly.  Lulz.  But the nice attendant guy just kept shoving foam behind me so I could drive.  After our go-kart drive, we went on a tour of the actual Grand Prix track having a look at all the control rooms, the pitt lane and the view from the corporate boxes.


By the time we finished the tour it was 3:30 and we had 2.5 hours to drive to Melbourne airport in time to return the hire car and check-in for our flight home.
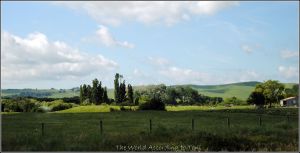
Scenery on the way to the airport

The drive back into the city was quite smooth, only slowing down once we got right in the city and had to go from the Monash Freeway onto the Citylink Tollway.  We got to the airport with just enough time to have an early dinner and a drink in the Irish bar before boarding our flight home.
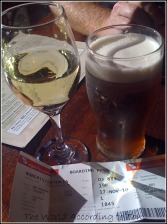
Depending on how our fortunes go, if it was our last holiday for a while, it was a really good holiday to end it on 🙂


Some graffiti in Union Lane


Point Nepean National Park
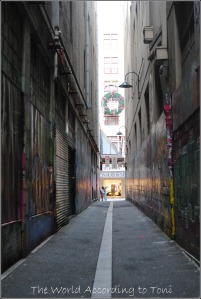
Union Lane, Melbourne
A much needed update…

HAPPY NEW YEAR!!!

But I’ve been a bad, bad blogger! *slaps non-typing hands*

Forgive me bloggesphere for I have not blogged in over 2 and a bit months.  Terrible, terrible me.   I generally write my blog when I’m on night shift at work during the down time but the last few months have been pretty very busy.  As Christmas has been getting closer and the Aussie dollar continues to be nice and strong against the US dollar, people have increased their overseas buying which means less down time for me at work.   Oh well, such is life.
And now while I have a few days grace whilst it’s a touch quiet over the new year period, I thought I should update my blog.

So this is what I have been doing in the last few weeks:

Hope you’ve all had a very lovely Christmas and best wishes for the New Year! xx

Thank you for reading!

I can make butter!!!

One of my favourite blogs at the moment is Fig Jam and Lime Cordial.  Celia’s blog is filled with lots of wonderful posts about all the food things she makes from scratch such as breads, jams and biscuits.  While trawling through her extensive blog, I found a post on  how to make butter.  I never knew it was so super easy peasy!  All you needed was some pure cream (a few days expired is better) and some salt.  Oh and a mixer that can take a whisk and paddle attachment helps as well.  It seriously only took about 10 mins all up to do.  Here’s some photos of my butter making experience, but go to Celia’s blog post for some detailed instructions.

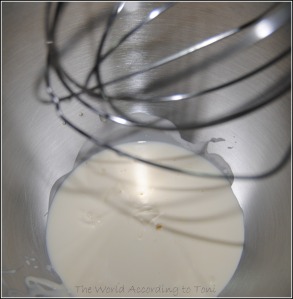
Add cream to a mixer bowl with the whisk attachment

Previously I used to throw out so much cream.  I’d buy it to make ganache and only ever needed a small amount – less than 100ml from a 300ml carton.  I always kept it with good intentions to use for something else, but the only thing I could always think of doing was whipping it up to add to a dessert.  And that would mean having to the then bake something to go with it.  Then the expiry date would come and go and I hadn’t got my act together to use the cream and out it went.  So now, no more thrown out cream!

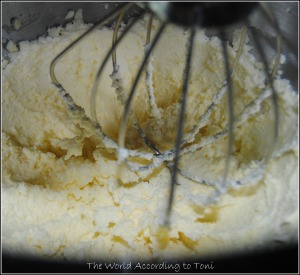
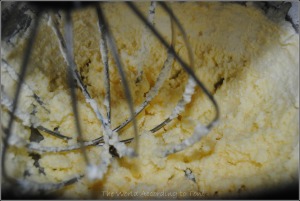
Add some salt.  I’m not sure how much.  I didn’t measure how much cream I had before I poured it into the bowl, then I added a pinch of salt and it turned out slightly salty which is ok for cooking/baking, but I’d prefer it saltier for toast.  Then whisk and whisk and whisk until it get’s thick and turns from this:

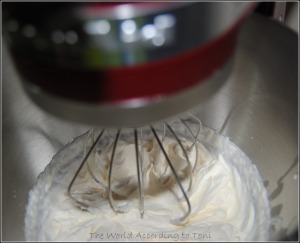
To this:

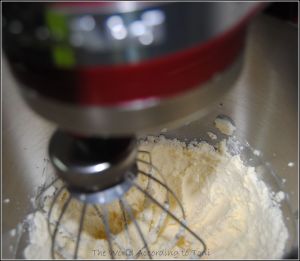
Then this:

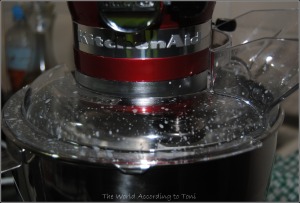
Once you get to this stage, if you have a splatter attachment, best to put it on, cause it get’s a touch messy!

I also draped a tea towel over the mixer at the back of the splatter attachment as it was going everywhere.  Keep mixing with the whisk attachment until the cream begins to separate into butter and buttermilk. 

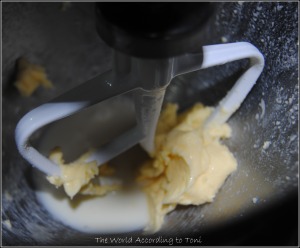
I found a good Wikipedia article that explains the churning  process in a bit more detail.  When the butter ‘bits’ (yes, I don’t think that’s the technical term…) come together and form recognisable lumps of butter, switch to the paddle attachment and mix a bit more so that it separates further.

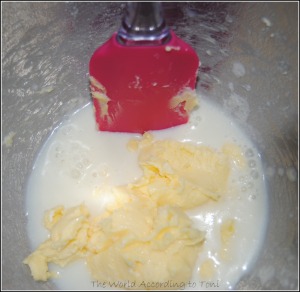
When most of the butter formed a clump, I used a spatula to gather the rest of it together.  I’ve never really used buttermilk, so I didn’t really have any use for it, but if you use buttermilk often, you can sieve the buttermilk at this stage and keep it for something else.

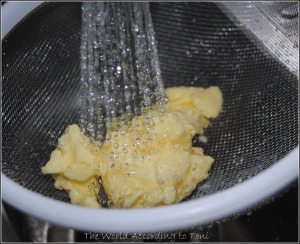
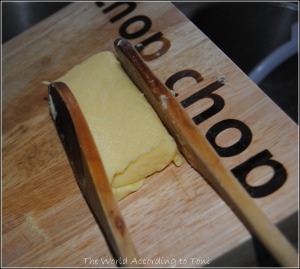
Rinse off the butter to get rid of any more of the buttermilk, then slap it down on a wooden board to get rid of the excess water and to shape it. 

Celia said the butter is less likely to stick to wood surfaces so she used a wooden board slanted over the sink (so the water drains away) and gnocchi paddles to do the slapping, but I don’t have any gnocchi boards, so I improvised with two wooden spoons, using the back of the spoons against the butter so it didn’t leave the spoon imprint and my wooden chopping board.  But if you have the gnocchi boards, use those because it leave some great looking lines imprinted in the butter (see the photo on Celia’s post).
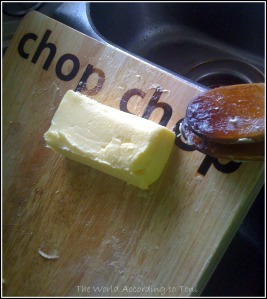
Then after a bit of slapping and shaping, et voilà you should have your own block or stick of butter 😀

Wrap it up in parchment paper (I used baking paper) then I wrapped it up in cling wrap.  I’m not sure how long it keeps for.  I made mine, then went to Melbourne for a week before I could use it then used it over a period of about 6 weeks and it was still good.  But if it doesn’t smell or look good, I wouldn’t use it.

Previous Older Entries